Running Diffusion in AWS with an AMI
Before you begin
It's assumed that you have:
- an AWS account
- an EC2 key pair
System Requirements
The amount of CPU and system memory your Diffusion Server requires depends on the number of client connections, data topics, and the number of messages sent to and from the Diffusion Server. The free demo version supports up to 5 client connections.
For more information about required system resources, such as vCPUs, memory, and storage, see the resource calculator.
Step 1: Get the AMI
You can get the AWS machine image (AMI) from AWS Marketplace
- Navigate to the DiffusionData page of the AWS Marketplace, and if you haven't already, log into your account.
- Select the desired version of the Diffusion Server to launch.
- On the Subscribe to this software page, review the Terms and Conditions and product details. When you're done, click Continue Configuration.
- On the Configure this software page, review the following settings and update them if necessary and click Continue to Launch when finished:
- Fulfilment option
- Region
- On the Launch this software page, review the Usage instructions. Then, from the Choose Action dropdown menu, select Launch through EC2.
- Click Launch. The Launch an instance page opens.
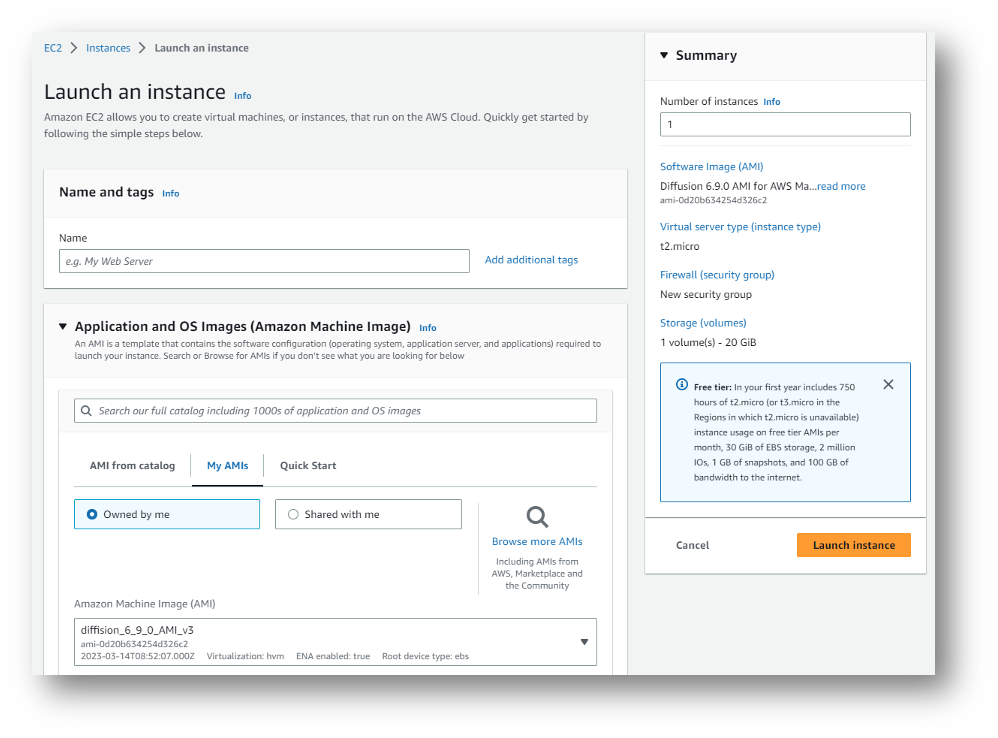
Step 2: Configure the Instance
To configure your EC2 instance, do the following:
Under Application and OS Images (Amazon Machine Image):
If you used your AWS account to get your AMI, select My AMIs. Then, select Shared with Me and choose your preferred AMI. If you used AWS Marketplace to get your AMI, your AMI is automatically selected for you under the AMI from catalogue tab.
Under Key pair (login), choose your authentication key pair for your Diffusion Server EC2 instance. This key pair is used to log in to the EC2 instance.
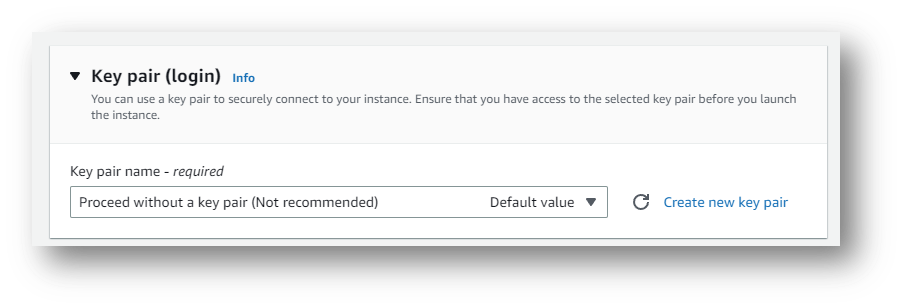
In case you do not have a key pair created yet, create a new one and download the PEM file.

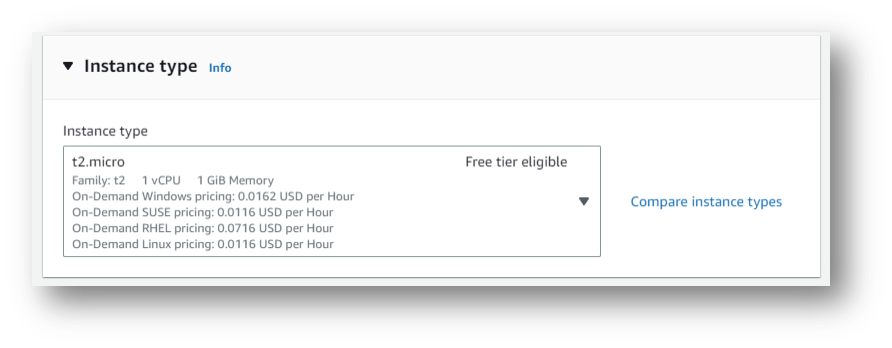
Under the Instance type, choose an instance that meets your resource needs (for example, for evaluation purposes, you might choose t4.micro). For information about the resources provided by the various instance types, see Amazon EC2 Instance Types.
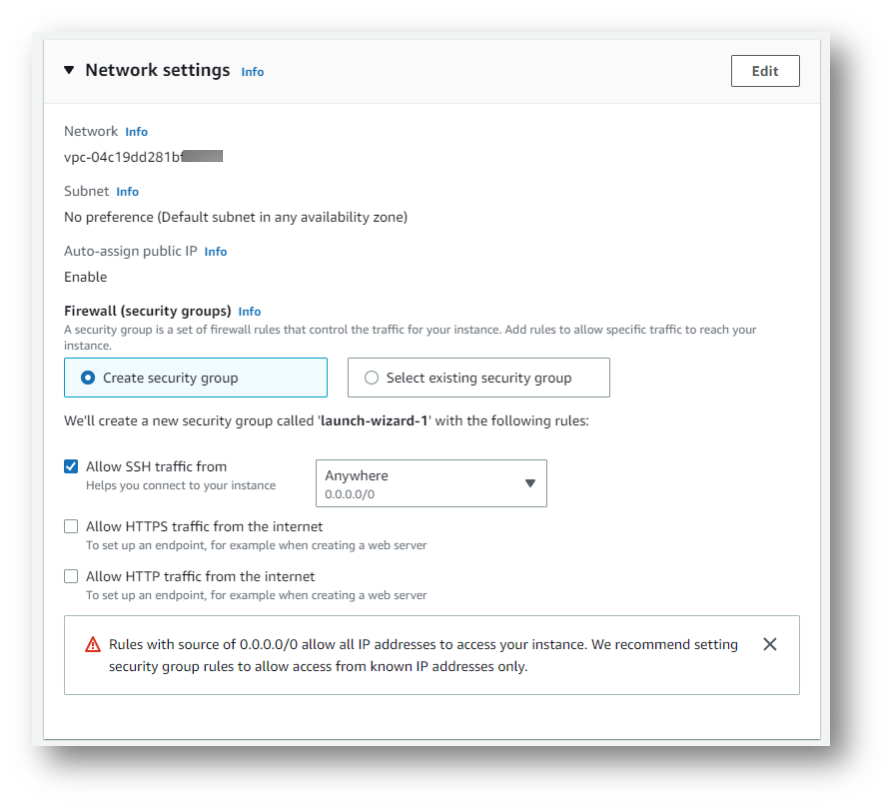
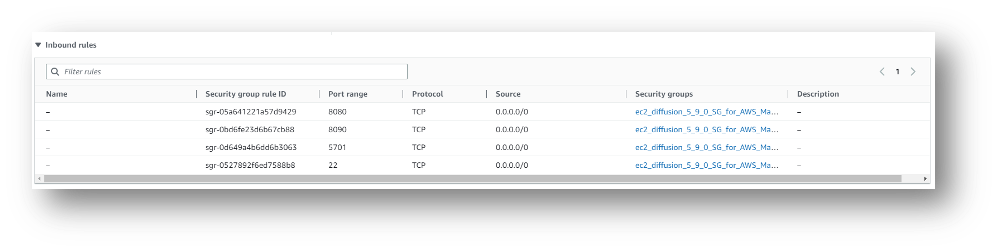
Under Network settings, select an existing security group or create a new one that suits your use case. When configuring the security group, bear in mind the ports the Diffusion server uses:
| Port | Protocol | Description | Source |
|---|---|---|---|
| 8080 | HTTP(s) | Client connector | End clients |
| 8090 | HTTP(s) | High-volume connector | Control clients |
| 5701 | TCP | Hazelcast | Between servers |
| 22 | SSH | SSH | Your local machine |
For early testing you will need access to ports 8080 and 22.
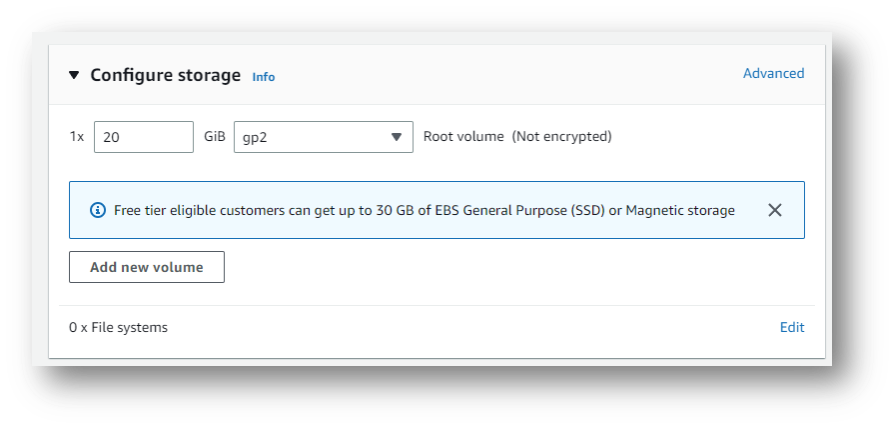
Under Configure storage, select the size of your storage volume.
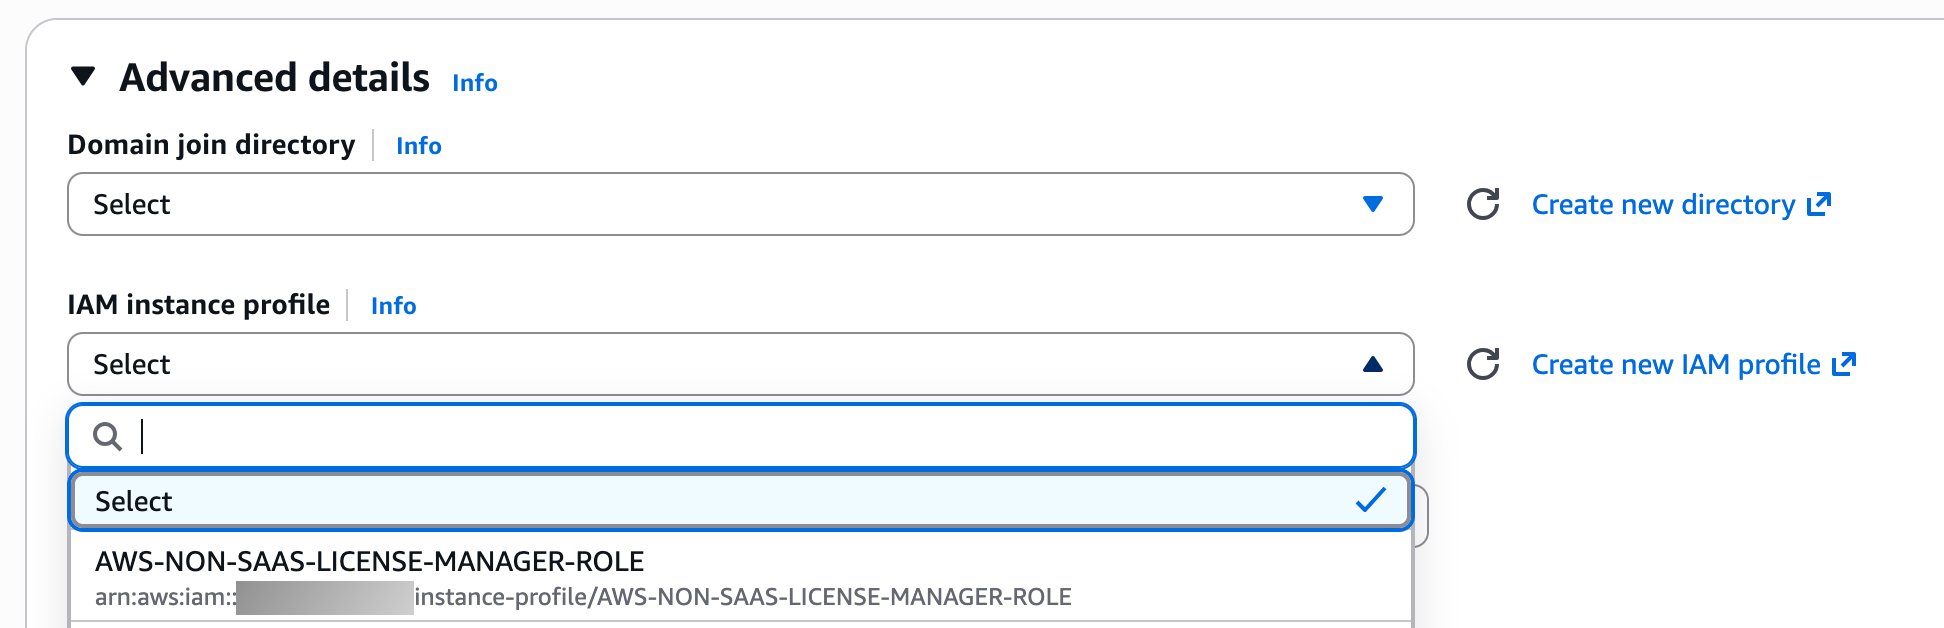
If the AMI integrates with the AWS License Manager, it will need additional permissions. Under IAM instance profile select a role with the required permissions.
The role will need to allow EC2 instances to assume the role like:
{
    "Version": "2012-10-17",
    "Statement": [
        {
            "Effect": "Allow",
            "Principal": {
                "Service": "ec2.amazonaws.com"
            },
            "Action": "sts:AssumeRole"
        }
    ]
}
The policy attached to the role will need to look something like:
{
    "Version": "2012-10-17",
    "Statement": {
        "Effect": "Allow",
        "Action": [
            "license-manager:CheckoutLicense",
            "license-manager:CheckInLicense",
            "license-manager:ExtendLicenseConsumption",
            "license-manager:GetLicense",
            "license-manager:ListReceivedLicenses"
        ],
        "Resource": "*"
    }
}
Click Launch Instance. When your instance has launched, the EC2 dashboard shows the Diffusion Server instance under Instances. Here you can find the external and internal IP addresses of the instance.

Please make sure that the following security settings are applied for the EC2 instance:

Step 3: Configure the Diffusion server
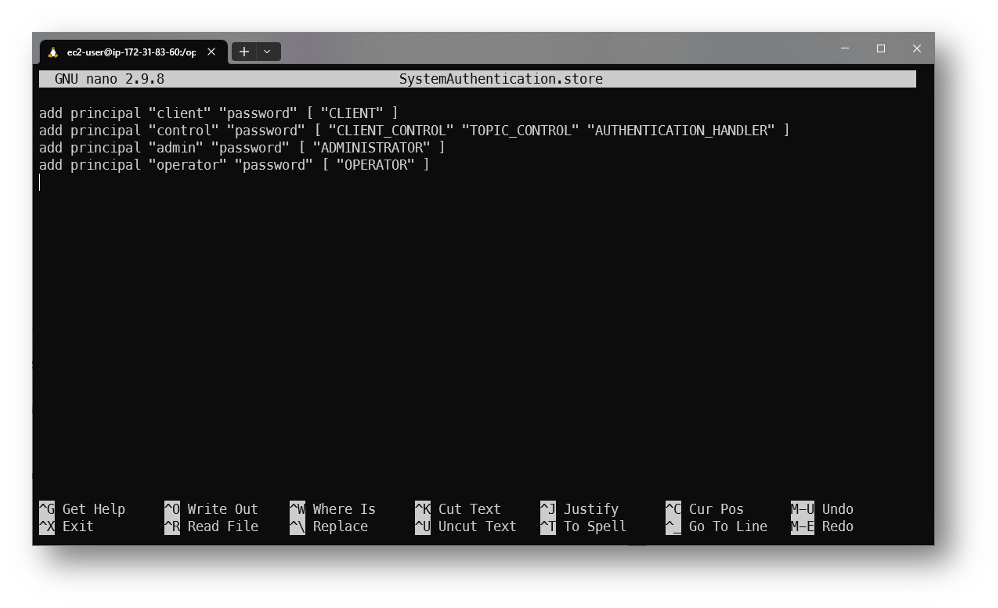
Please note that the Diffusion Server does not come with default user accounts. Thus, to log in to the web console, you need to manually add at least one user's credentials. To do this, you need to connect to your EC2 instance via SSH and add these details.
Connect to your EC2 instance., you can SSH into your EC2 instance with your private key using the public IP address and port 22. You can get the IP address from the AWS console (Public IPv4 DNS). Please use "ec2-user" as a username to connect to the CE2 instance.
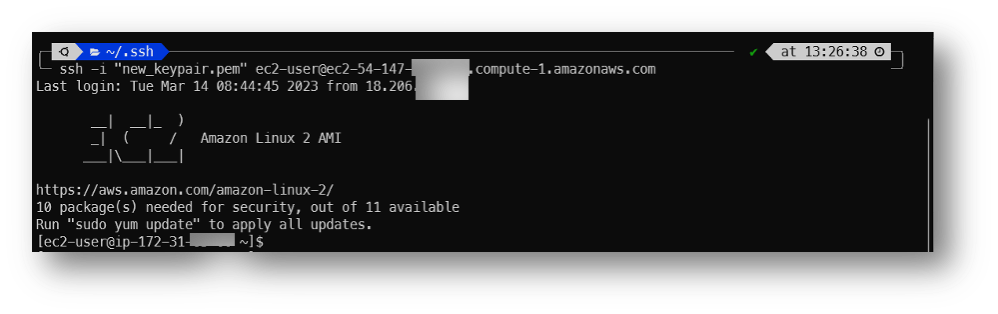
As soon as you successfully connected and logged in to the EC2 instance enter the following commands:
cd /opt/Diffusion/persistence
nano SystemAuthentication.store
As a result, you open SystemAuthentication.store file with the text editor where you should add credentials for at least one role:
add principal "admin" "password" [ "ADMINISTRATOR" ]Later you will be able to add more users via the web Console. Please ensure that you use a secure password.
Step 4: Verify the Diffusion server is running correctly
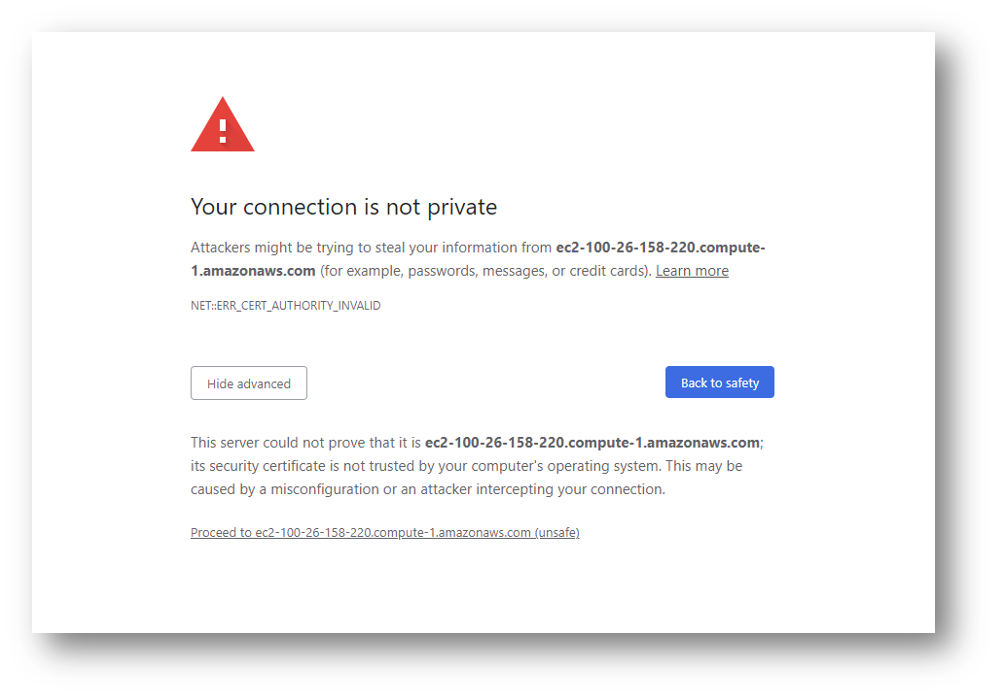
This is the final setup step. Please open your favourite web browser and navigate to https://<Public IPv4 DNS>:8080. Please note, that the Diffusion server installation does not come with the preinstalled SSL certificate so, you'll see the following warning message from the browser:
As soon as you accept that warning you'll be navigated to the following page:
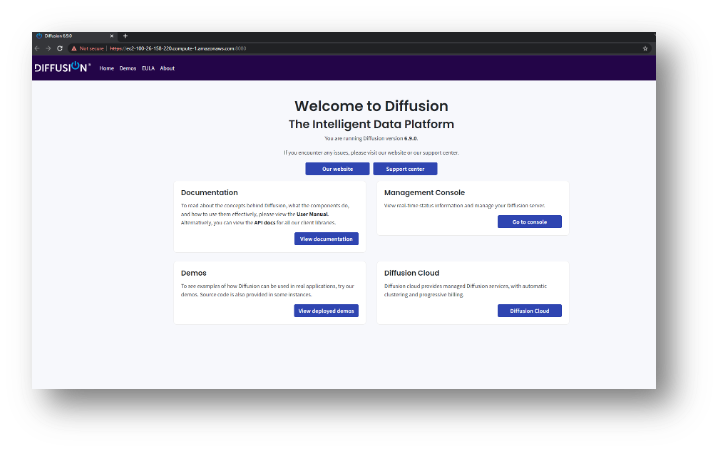
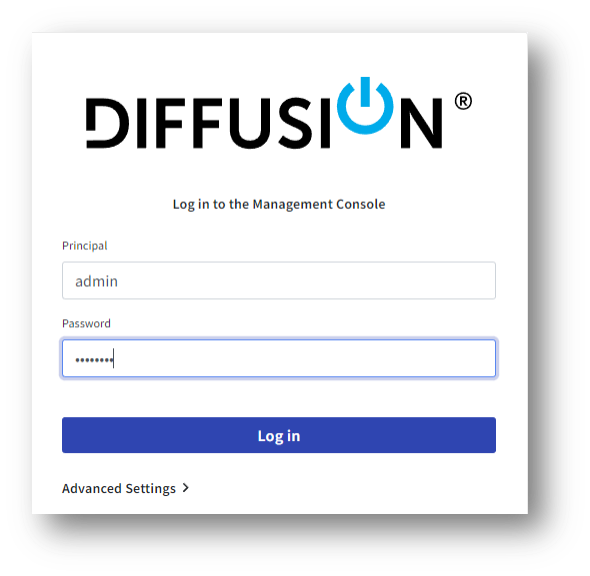
Click on the "Go to console" button and enter the credentials you've created on the previous step to the Login dialog.
Finally, navigate to the License section and check the details of your licence:

Step 5: Additional configuration and best practices
We typically recommend running a load balancer in front of the Diffusion server. An Application Load Balancer supports WebSocket traffic. Recommended features to use with the ALB include HTTPS termination and the Web Application Firewall. A Diffusion server is more secure if it can only be accessed through an ALB.
Configuring a Virtual Private Cloud (VPC) grants greater control over access to the Diffusion server.
Implement a monitoring solution to monitor the Diffusion server.
Implement control clients to publish data to the service and provide other key functionality like authentication and authorization.
Implement consuming clients for customer facing applications.