Installing and starting Diffusion®
You can install Diffusion® using any of the three methods described in this topic.
Docker
Diffusion® is available as a Docker image from Docker Hub. You can use Docker to install the Diffusion® server, and a minimal complete set of its dependencies, on a Linux™ system.
You must have Docker installed on your system to run Diffusion® from a Docker image. For more information see the Docker User Guide.
Using Docker enables you to install Diffusion® in an isolated and reproducible way.
Port 8080 is the port that is configured to allow client connections by default.
This image contains a Diffusion® server with a trial license and default configuration and security.
Installation
-
Pull the latest version of the Diffusion® image.
docker pull pushtechnology/docker-diffusion:6.11.7 -
Run the image.
docker run -p 8080:8080 image_id -
Where
image_idis the ID of the image to run. You can find the image ID usingdocker images
Diffusion® is now running in a container on your system.
Installer
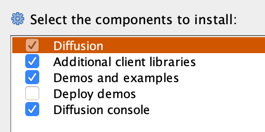
To install Diffusion on your local machine, download the free trial version from the DiffusionData website.
Make sure you have Java 17 JDK (17.0.0 or higher) installed.

Once Diffusion® is installed, navigate to the directory where you installed it and run the startup script.
You should see Diffusion®'s startup logs in the terminal.
By default, Diffusion®'s web console will now be running at localhost:8080 with admin credentials set to admin / password.
On MacOS or Linux, from the terminal, run:
sh bin/diffusion.shOn Windows, either from Windows Explorer, Windows Powershell or the Command Terminal, run:
bin\diffusion.bat